
27 February 2007
sol*631

 a robot for Bruno
This toy made from Hillary Lang's Spaceboy & Robot Put Together Book came out of unembellished limbo yesterday when Bruno and I pulled out the Shrinky Dinks. He has been wondering about how it would be possible to explore the Sun, so he equipped his robot with the shades and devices it'll need to do the job. I noticed that the number fabric I used for the head just happened to show 631 on each side...sol*631.
Labels: crafting with children, sewing
22 February 2007
go, go marbles
hand-painted watercolor paper marble mazes


These just came in the mail for the boys from my genius sister Margie. Maybe she'll comment with a brief how-to. Brilliant in every way. Thanks, Margie!


These just came in the mail for the boys from my genius sister Margie. Maybe she'll comment with a brief how-to. Brilliant in every way. Thanks, Margie!
18 February 2007
scrappy
a hybrid baby blanket
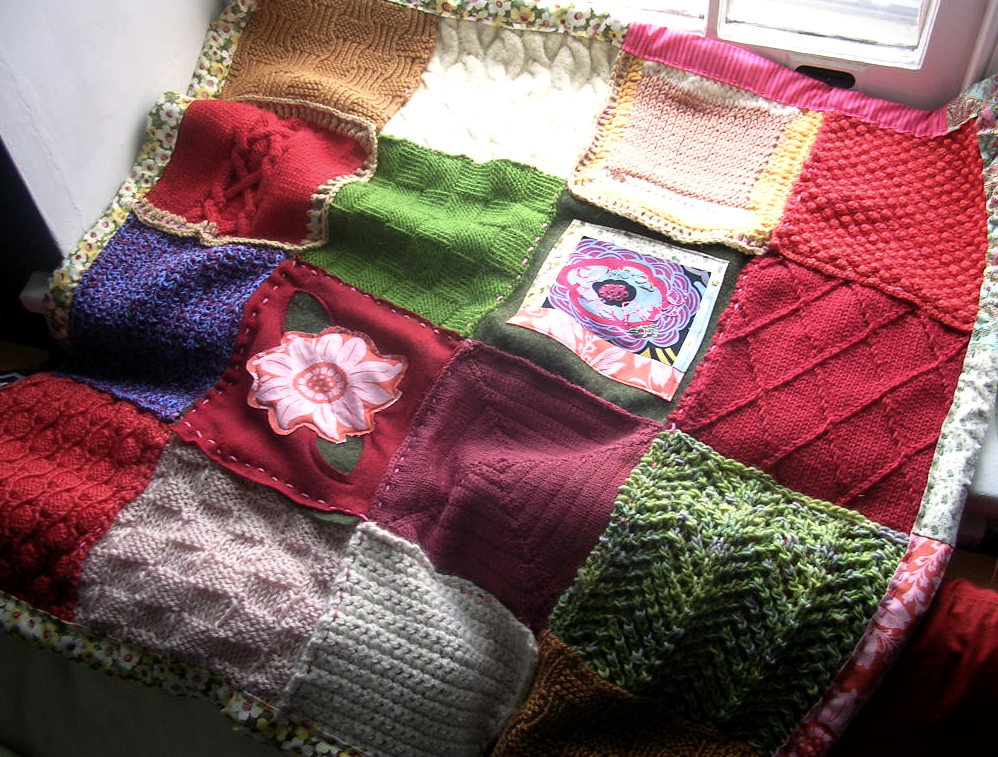
 Using pink dishcloth cotton yarn and a tapestry needle, I joined a collection of knit and felted blocks with running stitch. I made decisions about overlapping edges as I went along.
 Some blocks required backing and I hit on the idea of reverse appliqued leaves for this flower I machine stitched here. The block to the left was my first block for Stitch Marker's Squarealong that ended up too big. I machine quilted it to a block I cut from a thrifted sweater.
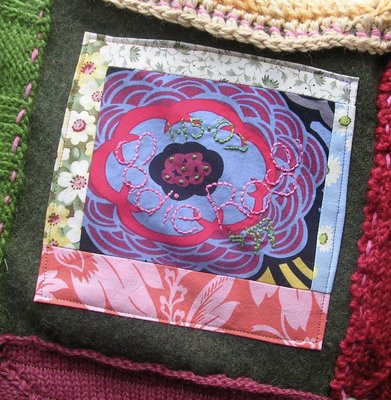 I embroidered the baby's name onto a log cabin patch for this block.
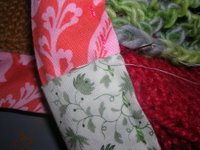
 I just loved this detail.
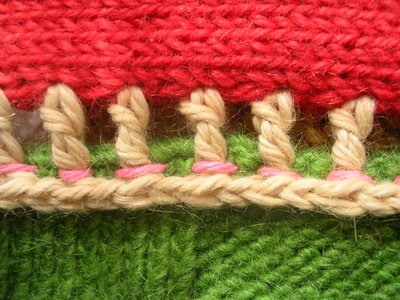
TIPS AND VISUAL AIDS FOR BINDING A KNITTED BLANKET WITH FABRIC: For my 1.5" binding I cut and pieced 5" wide strips of fabric, pressing open the seams between pieces. I folded the strip in half and pressed it and then folded each long side toward the fold, pressing and measuring to make certain my the binding measured 1.5" wide.
 Starting in the middle of one side of the blanket, I tucked the blanket edge into the binding as you see below. (I didn't use pins since the binding and blanket required constant tucking and adjusting.)
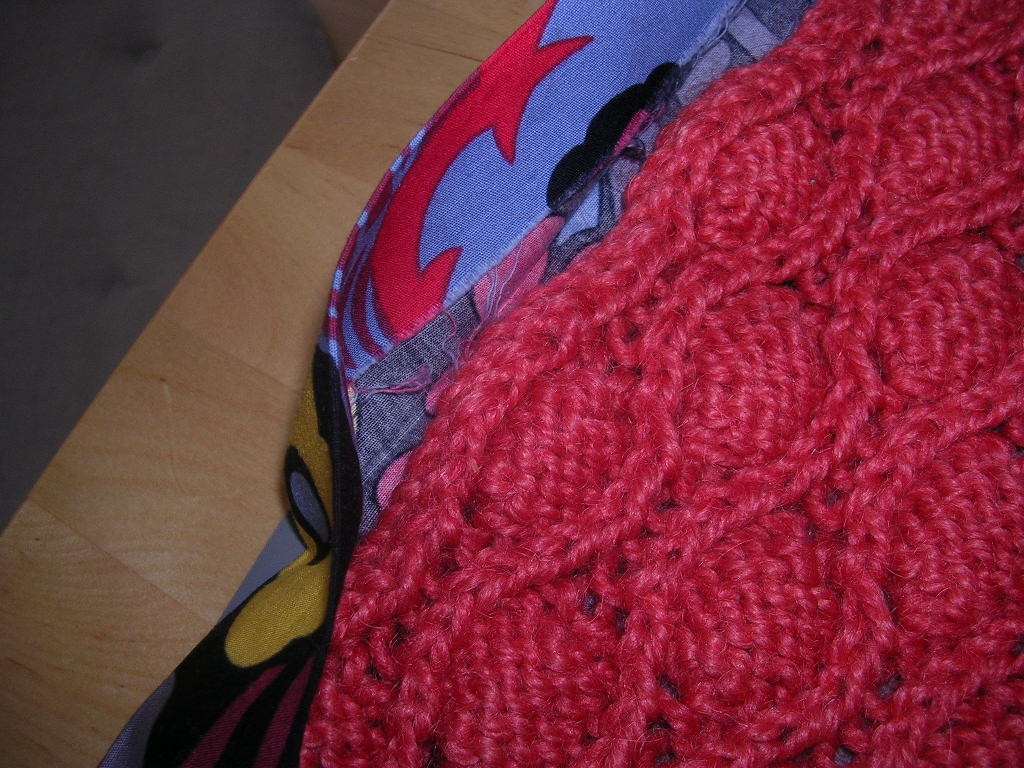
 I used a simple running stitch of DMC perle cotton. (Sorry about the blur.)
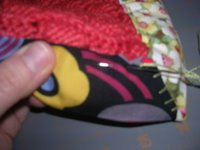
 When I got to within 1.5" of a corner, I tucked the binding around it and pinned.
 First I pulled the binding to form a crisp corner (top photo) and then I folded it down to form the miter. I pinned that miter and then turned the blanket over and formed a miter on the other side.
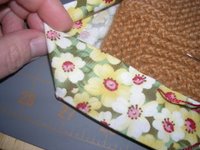
 I embroidered through all layers to secure the corners.
 When I got to the end of the binding, I folded the raw edge in and used thread and a blind stitch to finish.
 Using pink dishcloth cotton yarn and a tapestry needle, I joined a collection of knit and felted blocks with running stitch. I made decisions about overlapping edges as I went along.
 Some blocks required backing and I hit on the idea of reverse appliqued leaves for this flower I machine stitched here. The block to the left was my first block for Stitch Marker's Squarealong that ended up too big. I machine quilted it to a block I cut from a thrifted sweater.
 I embroidered the baby's name onto a log cabin patch for this block.
 I just loved this detail.
TIPS AND VISUAL AIDS FOR BINDING A KNITTED BLANKET WITH FABRIC: For my 1.5" binding I cut and pieced 5" wide strips of fabric, pressing open the seams between pieces. I folded the strip in half and pressed it and then folded each long side toward the fold, pressing and measuring to make certain my the binding measured 1.5" wide.
 Starting in the middle of one side of the blanket, I tucked the blanket edge into the binding as you see below. (I didn't use pins since the binding and blanket required constant tucking and adjusting.)
 I used a simple running stitch of DMC perle cotton. (Sorry about the blur.)
 When I got to within 1.5" of a corner, I tucked the binding around it and pinned.
 First I pulled the binding to form a crisp corner (top photo) and then I folded it down to form the miter. I pinned that miter and then turned the blanket over and formed a miter on the other side.
 I embroidered through all layers to secure the corners.
 When I got to the end of the binding, I folded the raw edge in and used thread and a blind stitch to finish.
17 February 2007
glimmering
 my ninth baby Jane block ("Mirror Image")
This beautiful fabric (thanks, Kay!) isn't so nice in this scan. Here's a better representation of it along with swatches of artist and designer Kristine Baerlin's Field Study Glimmer collection which is distressingly hard to find. A natural light photo of this square, my others squares and the amazing work of my fellow baby Jane makers can be seen here. These quilters helped my first go at piecing curves go quite nicely. Further encouragement and visual aids in The Modern Quilt Workshop by Weeks Ringle and Bill Kerr helped me to understand how to set the pieces against one another for sewing. A curve isn't a quite a cinch for me, but it's not as hard as it seems and getting it to work is the most satisfying piecing feat I've had yet. However, the teeny tiny triangles like this one by Jennifer of moving hands might be the end of me.
16 February 2007
into the woods
 my ninth baby Jane block ("Meeting Place")...sewn with Martha Negley's "twig stripe" fabric
15 February 2007
35 to life
 my eighth baby Jane block ("Quilt Jail")
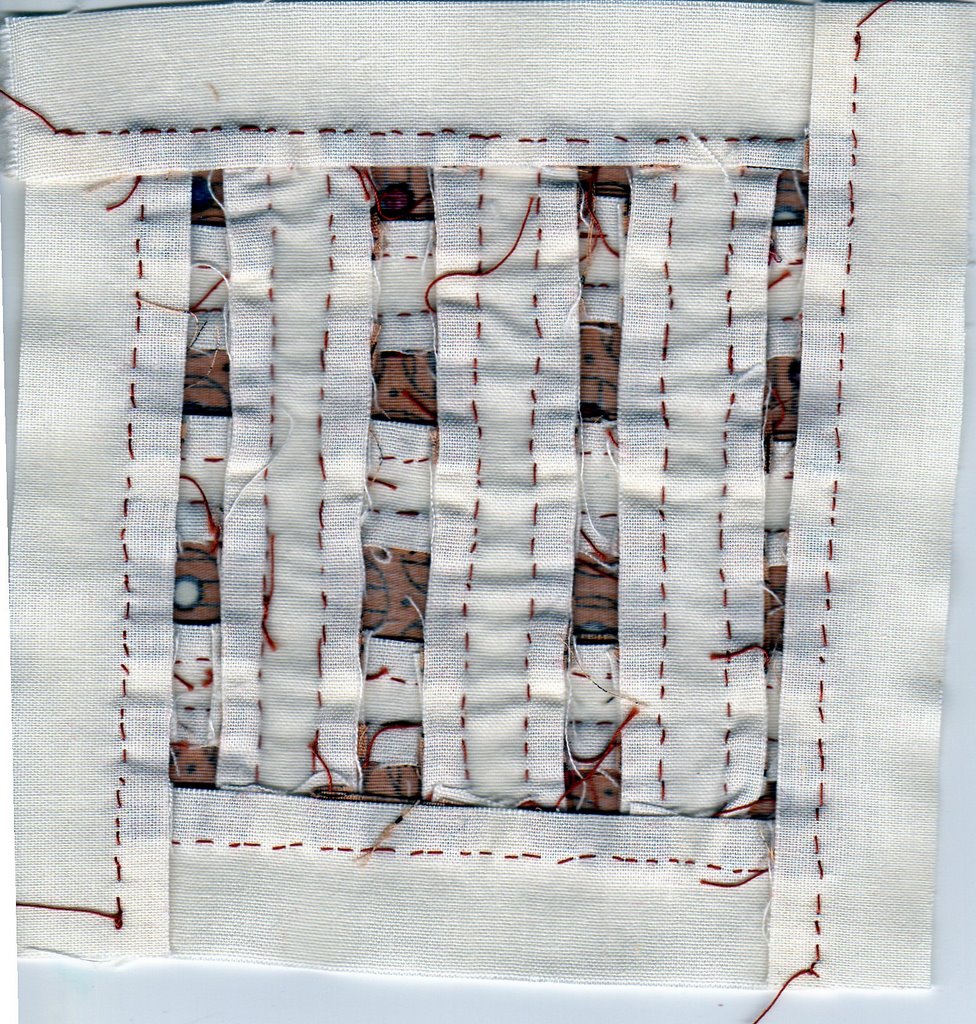
I found this print at Reproduction Fabrics when I was in Bozeman, Montana last summer. I made this block of thirty-five little pieces and enjoyed every stitch. Here's a shot of the back (quilters please comment about whether I'm pressing my seams in the right direction).
14 February 2007
st. valentine
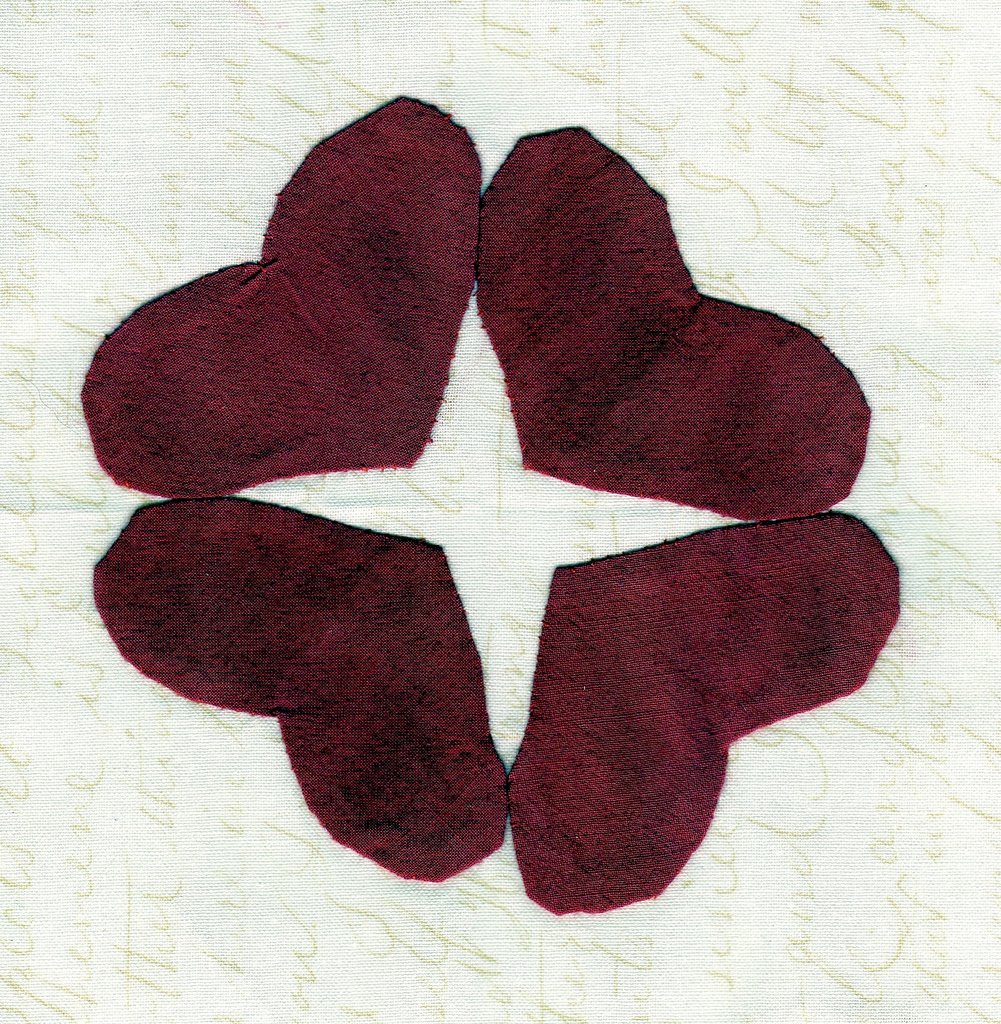 my seventh baby Jane block ("Hannah Lou's Hearts")
It's the love that counts.
09 February 2007
shantung
a silk pouch for anntorp
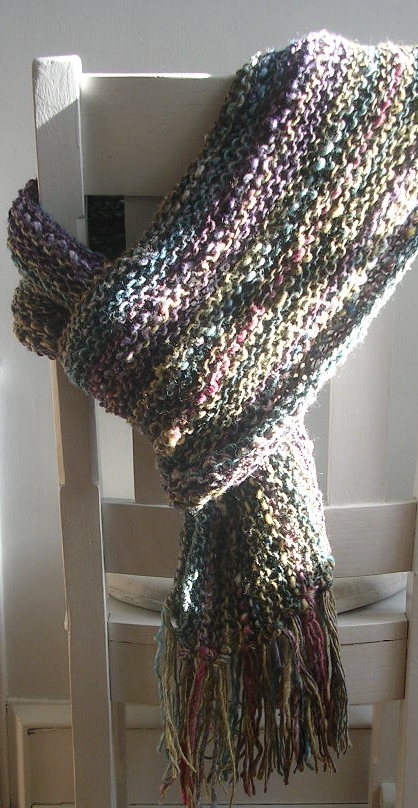
I'm donating the Noro scarf to a silent auction to benefit my son's school and I thought I would gild the lily (in a good way) and make a little bag for the winning bidder to store the scarf in during the summer months. This is a simple folded rectangle of silk shantung (instructions for something similar appear in Last Minute Knitted Gifts). To make the scrap of fabric I had long enough, I pieced strips to the tops with the grain running perpendicularly to the grain of the main body of the pouch (I can't capture it in a photo, but it appears like the top part of the bag is in a different shade of coral than the body). I ran over the pieced seam again and again with straight and zigzag stitches and then I hit on the idea of zigzagging over bits of leftover yarn to add more decoration and hint at the contents of the bag. I used more leftover yarn to make twisted cords for the closure.


I'm donating the Noro scarf to a silent auction to benefit my son's school and I thought I would gild the lily (in a good way) and make a little bag for the winning bidder to store the scarf in during the summer months. This is a simple folded rectangle of silk shantung (instructions for something similar appear in Last Minute Knitted Gifts). To make the scrap of fabric I had long enough, I pieced strips to the tops with the grain running perpendicularly to the grain of the main body of the pouch (I can't capture it in a photo, but it appears like the top part of the bag is in a different shade of coral than the body). I ran over the pieced seam again and again with straight and zigzag stitches and then I hit on the idea of zigzagging over bits of leftover yarn to add more decoration and hint at the contents of the bag. I used more leftover yarn to make twisted cords for the closure.

07 February 2007
anntorp
a long, fringed scarf MATERIALS: 5 balls Noro Silk Garden #24 and 1 hank Transitions #5
NEEDLE: Size 13US circular
PATTERN: Cornelia Tuttle Hamilton's from her first Noro book
 the French Lieutenant's Woman's baby
 MATERIALS: 5 balls Noro Silk Garden #24 and 1 hank Transitions #5
NEEDLE: Size 13US circular
PATTERN: Cornelia Tuttle Hamilton's from her first Noro book
 the French Lieutenant's Woman's baby
06 February 2007
cocky
 crowing about my sister
This is Margie's hand-embroidered rooster for the quilt she and my sisters, mom, sisters-in-law, neices and nephews (one of my brothers cross-stitched for the cause, too) made for my son Bruno. Margie is the most meticulous and inventive handworker I know. She made this little hand-knotted masterpiece for Elio. Click Judy Chicago's International Quilting Bee page to see Margie's contribution: the weeping willow on a blue field made in remembrance of Mary, Margie's mother.
02 February 2007
st. brigid
The First
The first man who whistled
thought he had a wren in his mouth.
He went around all day
with his lips puckered,
afraid to swallow.
-Wendell Berry, 1980
for A Bloggers (Silent) Poetry Reading with thanks to Anna.
The first man who whistled
thought he had a wren in his mouth.
He went around all day
with his lips puckered,
afraid to swallow.
-Wendell Berry, 1980
for A Bloggers (Silent) Poetry Reading with thanks to Anna.
a.d. 2007
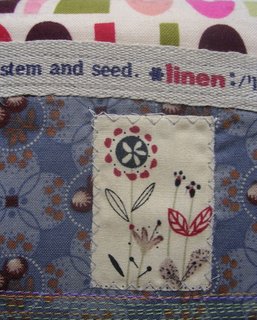
my new date book (one month late)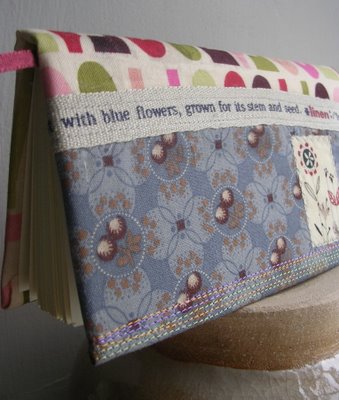 I covered a text block and bookboard kit from paper-source with machine-pieced fabric backed with craft-fuse. The machine embroidered stripes at the bottom were stitched with variegated thread. Paper-source kits come with instructions for covering books in paper; fabric makes a completely unproblematic substitution and can be pieced and decorated like you would a quilt block or embroidered patch. I sometimes find bulkier embellishments like the ribbon on this book require clamping at the folds with an office-supply store binder clip while the glue is drying--aside from glue (Mod Podge is fine for non-archival work), a foam brush to spread glue evenly, a bonefolder for smoothing out surfaces and tucking in corners, covering books doesn't require special equipment.
 Here's a photo of last year's book. Follow this link to Simmy's site to see her tutorial on covering books.
 I covered a text block and bookboard kit from paper-source with machine-pieced fabric backed with craft-fuse. The machine embroidered stripes at the bottom were stitched with variegated thread. Paper-source kits come with instructions for covering books in paper; fabric makes a completely unproblematic substitution and can be pieced and decorated like you would a quilt block or embroidered patch. I sometimes find bulkier embellishments like the ribbon on this book require clamping at the folds with an office-supply store binder clip while the glue is drying--aside from glue (Mod Podge is fine for non-archival work), a foam brush to spread glue evenly, a bonefolder for smoothing out surfaces and tucking in corners, covering books doesn't require special equipment.
 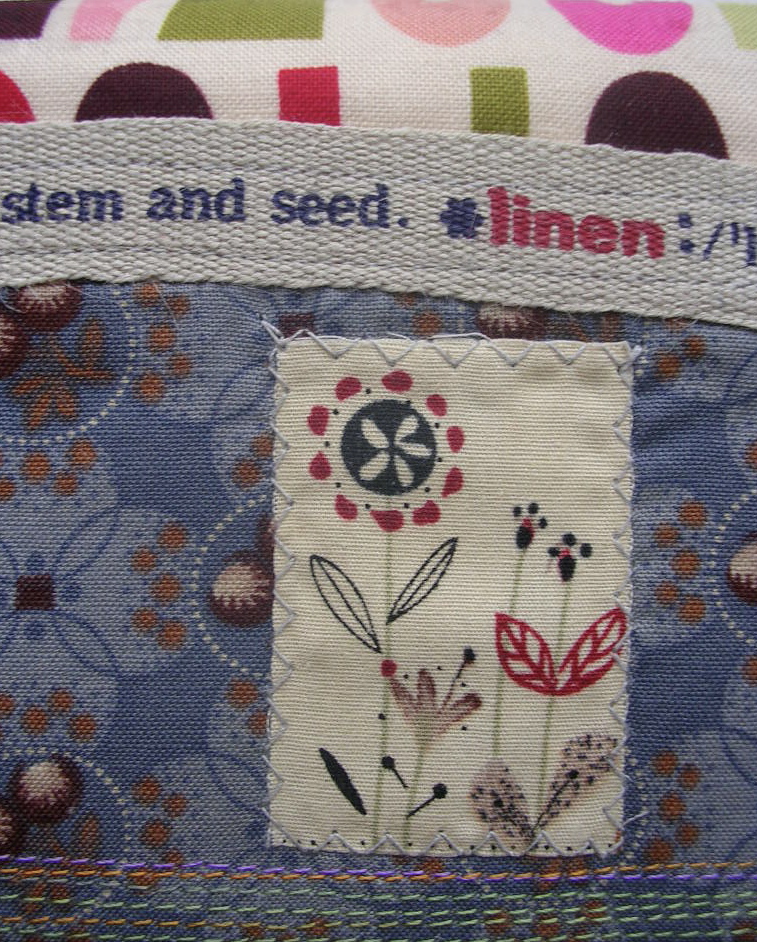 Here's a photo of last year's book. Follow this link to Simmy's site to see her tutorial on covering books.
01 February 2007
some things fishy
my sixth baby Jane block ("Simple Simon") and the address book I made this morning from a paper-source kit
 and the address book I made this morning from a paper-source kit
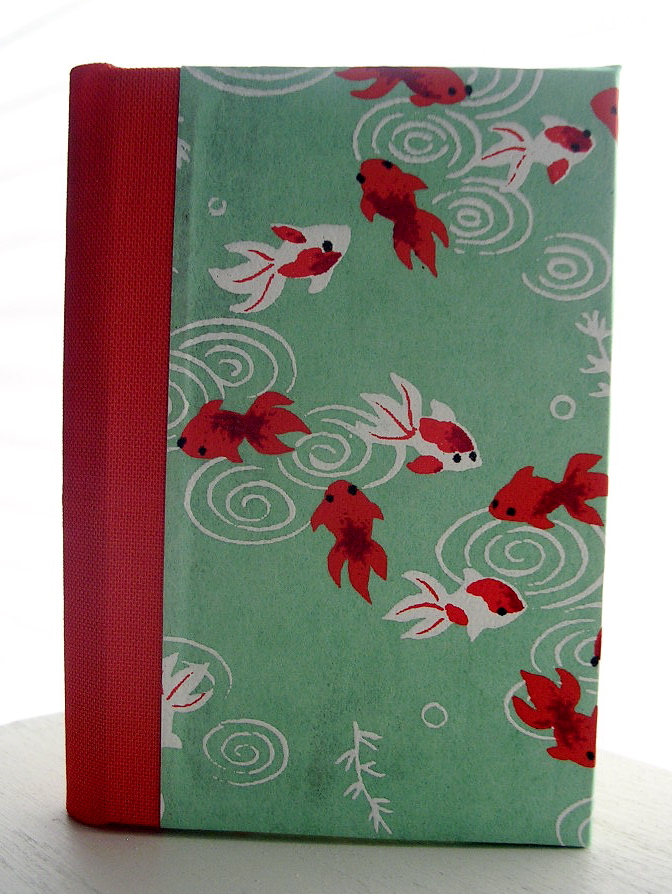
![]()
