
12 September 2006
boytoque
 a hat for Bruno
Whiplash Grade A Fancy. Within minutes of reading the September 1st announcement of this month's whip up whiplash theme, I had my plant-dyed alpaca (Cf. "plum", 7/10/06) in hand as I searched for size 2 dps. They were in an unfinished sock (Cf. "hiatus", 7/12/06). Now what? Rummage around for a tapestry needle and waste yarn and banish all that Trekking XXL to sock limbo? Or drag my toddler, my seven year old and his friend for a walk through the fringes of Hurricane Ernesto to the lys? At the moment of ordering everyone to put their rainboots on I layed eyes on size 2 single pointed needles. Dim memories surfaced of the Elizabeth Zimmerman Pothandler Baby Blanket I had knit for Bruno before he was born (Cf. The Knitter's Almanac). The design forming in my head had a brim made of one long tube. Knit a tube on two needles? It...could...work (Cf. Mel Brooks' Young Frankenstein)! I cast on 140 stitches and after two millennia I had this:
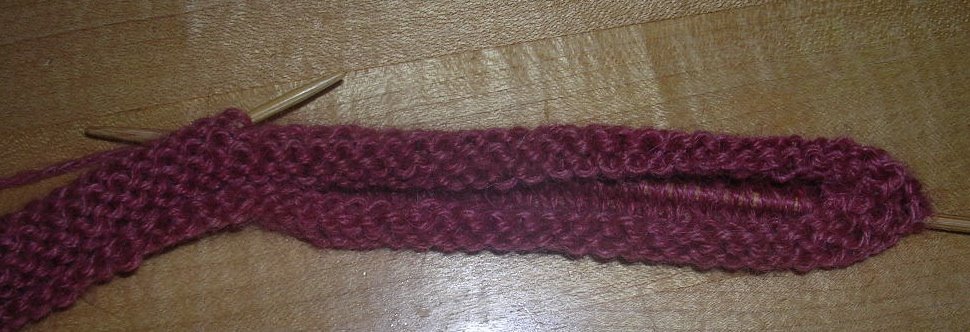 Okay, it only took half an hour, but all that slipping every other stitch on every row for ten inches of seven stitches per inch would take me far longer than two weeks. And I wanted to make the outer fold of the hat in an as-yet-unplotted openwork pattern. This project was supposed to be whip-uppity and I was feeling whipped.
 Then the rebound came. I had kid-friendly, machine-washable, DK-weight wool in the stash and nothing on my size 6 12" circular needles. Mammatoque was silenced (for now)....boytoque yelled,
 "Yay!"
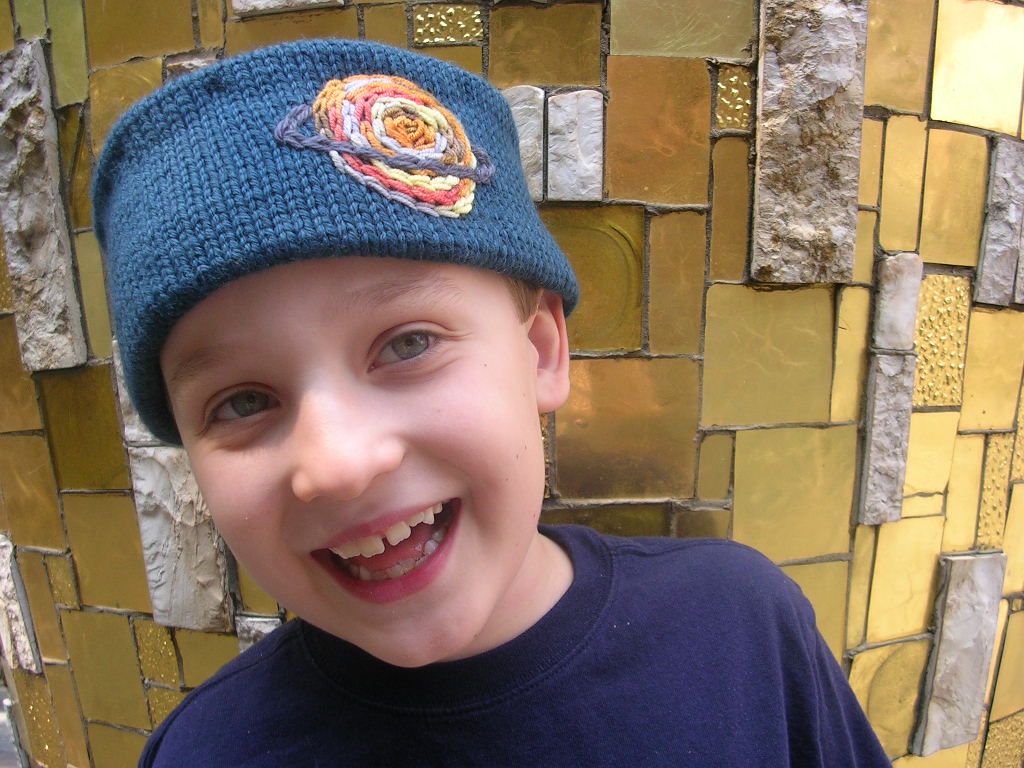
What follows is my pattern for the hat made with Mission Falls 1824 Wool that you see my son modeling in these pictures. You need only two measurements (the circumference of the head you want "to hat" and the height of the finished brim times two) and a gauge swatch to make the hat in any size and using whatever yarn you like. (Make your total stitch count a multiple of five if you plan to shape the crown with five "spokes" as I have in the pattern.)
MATERIALS: Two skeins of 1824 Wool in Teal (I had only a few yards left at the end, so if you're sizing up get an extra skein), a small amount of Art Yarns Ultramerino 4 (I couldn't find the shade I used on the Art Yarns color chart--it may be discontinued), a small amount of Knit Picks Merino Style in Pewter
TOOLS: size 6US 12" circular needle or dps OR SIZE TO OBTAIN GAUGE, tapestry needle
GAUGE: just like the ball band says, 18 stitches and 24 rows measured over 4 inches
MEASUREMENTS: The folded hat brim is about 22" around and almost four inches high.
PATTERN: Cast on 100 stitches using the long tail cast-on method and leave a more than usually generous tail. Join the stitches to work in the round and knit every round until the tube measures eight inches. Start the crown by purling one round, knitting one round and purling another round. Work a decrease round: *K 18, k2tog through the back loop (tbl), repeat from *. Purl one round. Work a decrease round: *K 17, k2tog tbl, repeat from *. Purl one round. Continue alternating decrease rounds and purl rounds as established until 60 stitches remain. Purl one round. Work a double decrease round: *K 8, k2tog tbl, k2tog tbl, repeat from *. Purl one round. Work a double decrease round: *K 6, k2tog tbl, k2tog tbl, repeat from *. Purl one round. Continue alternating double decrease rounds and purl rounds as established until ten stitches remain. Cut yarn and thread the end onto a tapestry needle. Draw the yarn through the ten stitches as you remove them from the needle and pull tight. Turn the hat inside out and sew in the end. Now thread the generous tail you left on the cast-on edge onto the tapestry needle. Fold the brim up so that the cast-on edge meets the first ridge of the garter stitch crown. Use a whip stitch (or your preferred method) to sew the edge firmly, but not tightly to the garter ridge. Leave the needle on the yarn. Turn the hat right side out. It now looks like this:
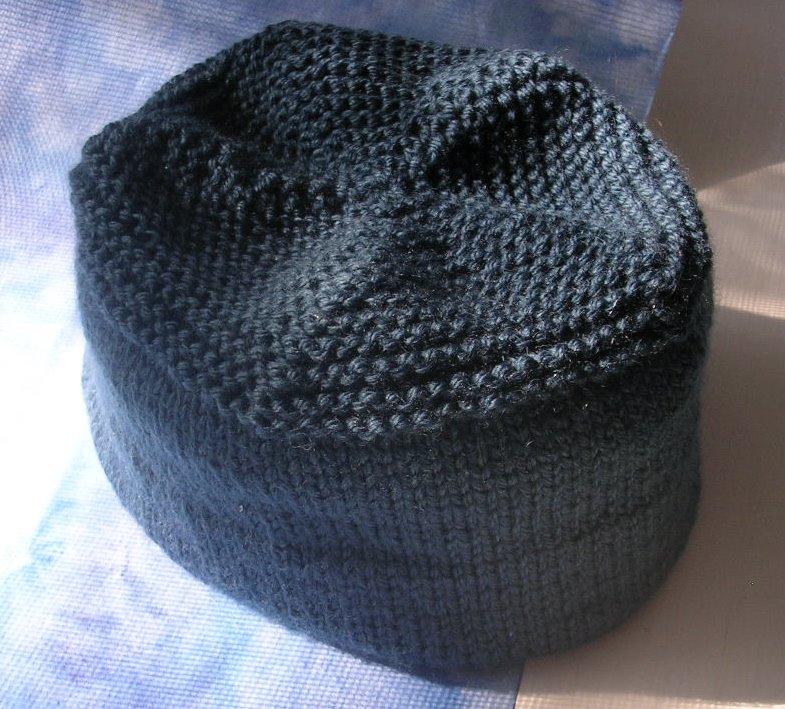 You (may--it's cute without the lip, too) want it to look like this:
 Pull at the brim to form a lip about 3/4" deep where the brim meets the crown. Using the still-threaded tail and small stitches placed about every inch along the hat brim, secure the lip to the edge of the crown:
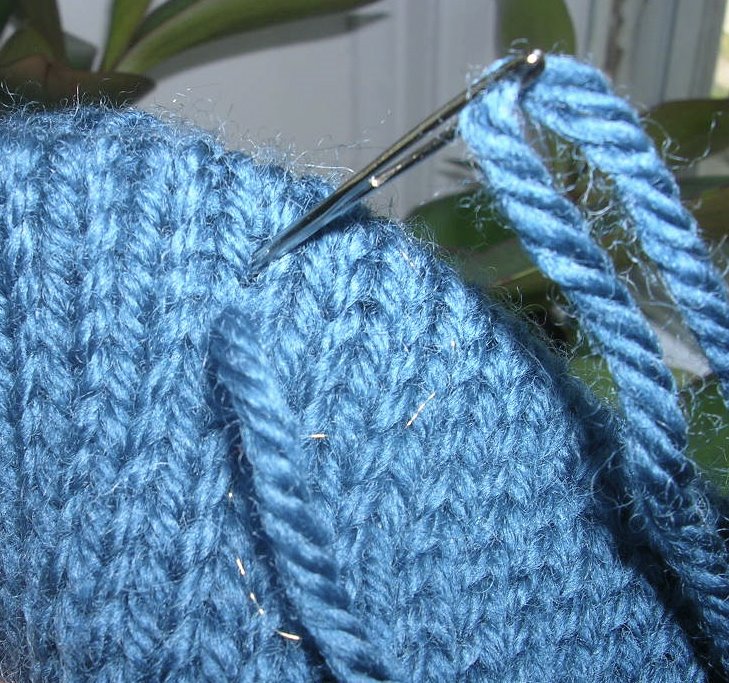 The stitches catch just one horizontal bar of yarn before going back through the brim and crown. Click on the photo for a close-up.
Sew in the end and give your completed hat a sturdy steam blocking. Now you're ready to embellish. Here's a close-up of the chain-stitched Saturn Bruno requested for his hat:
 It would have looked more realistic if I had zig-zagged the stitches instead of sewing in a circle, but I'm still waiting for the re-do impulse to whip me. However you embellish your boytoque, or wherever you take the basic pattern (pillowtoque in GGH Touch Me? babytoque with ear flaps? fully reversible doubletoque?), I'd love to see a photo in my box at cbshiffman at yahoo dot com or a link to your site. Toque to me. -Cristina

Comments:
<< Home
The verb 'to hat'. Toque to me. Yer crackin me up here.....
Whip Uppity indeed. xox Kay
Post a Comment
Whip Uppity indeed. xox Kay
# posted by  : 7:39 AM
: 7:39 AM 
<< Home
![]()
